こんにちはジョージです。Claris FileMaker 2023 が日本でも遂に公開されました。
本バージョンより Ubuntu Linux でも arm64 アーキテクチャがサポートされるので M1、M2 チップが搭載された Mac から Ubuntu の仮想マシンを立ち上げ、FileMaker Server を利用する事も可能となります。
https://help.claris.com/ja/server-release-notes/content/index.html
そんな Claris FileMaker 2023 を Docker インストールスクリプトファイルを使って起動させてみましょう!
動作環境
FileMaker Server 2023
macOS Ventura:13.3.1 Apple M1
Docker Desktop:4.19.0
Visual Studio Code :バージョン: 1.78.1
Visual Studio Code Plugin Dev Containers v0.292.0
データベースフォルダ:~/Document/repos/fms/data
- FileMaker Server をはじめとしたリレーショナルデータベース管理システムを Docker で起動する場合、データベースファイルやログファイルはコンテナの外(ホスト PC)にある、特定のフォルダ/ディレクトリに関連づけ管理し、変更内容を永続化させるのが一般的のようです。
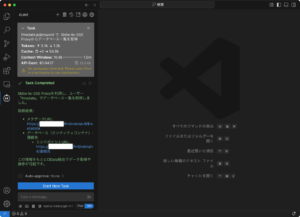
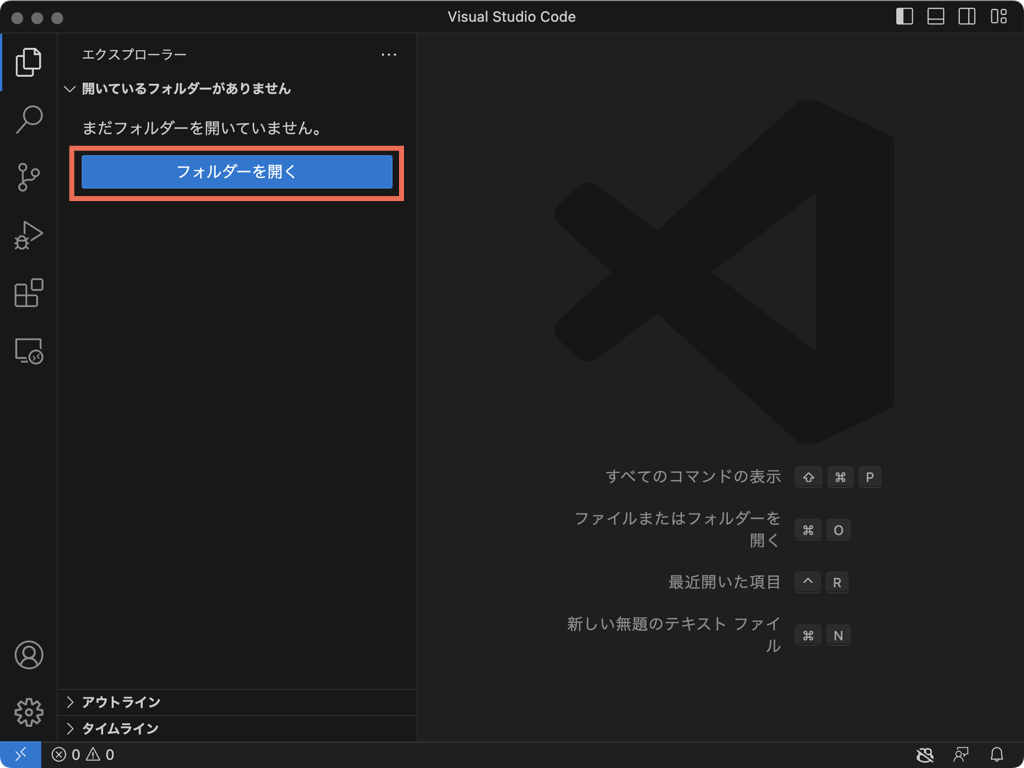
VSCode(Dev Container プラグイン)でコンテナ起動
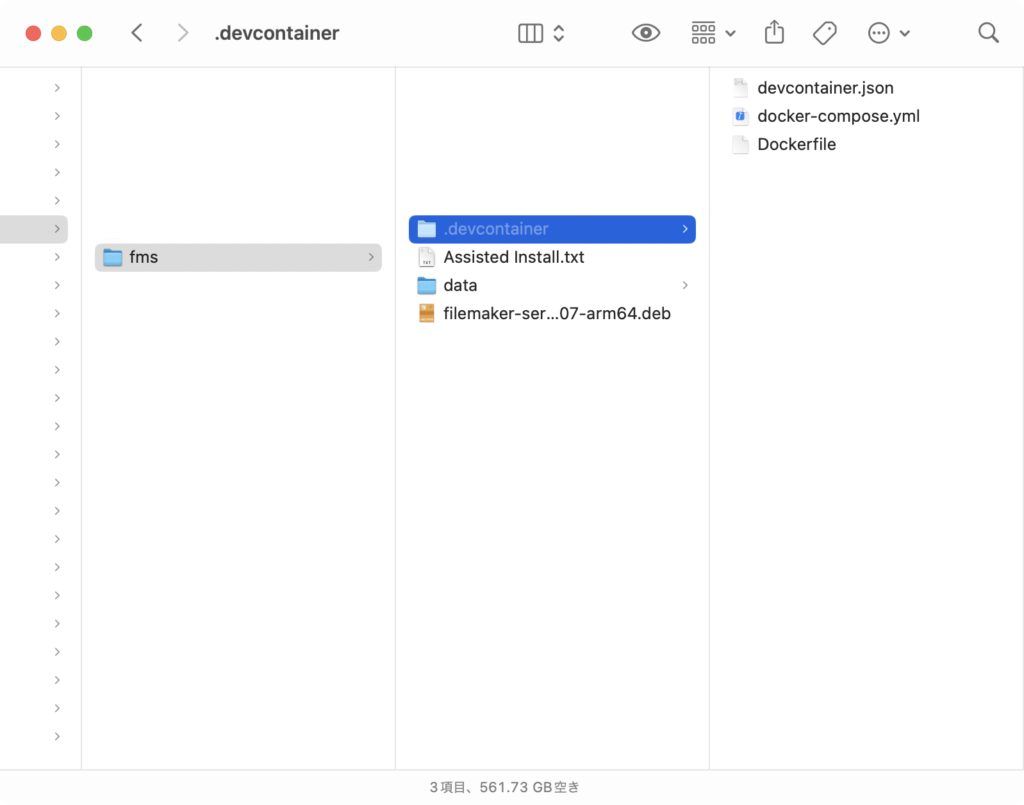
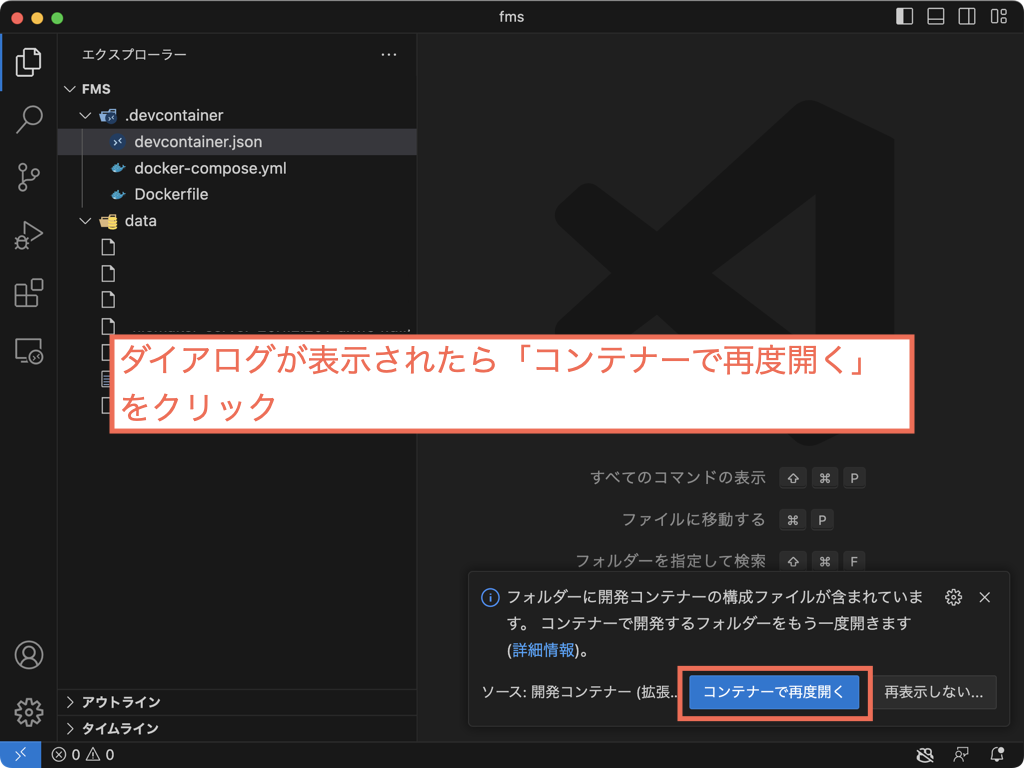
Claris エンジニアリング ブログでは、docker コマンドでコンテナを起動する方法が紹介されています。今回はもっと簡単に、VSCode(Dev Container プラグイン)をつかってコンテナを起動します。図のように「.devcontainer」フォルダを作成して必要なファイルを配置すれば、VSCode からコンテナを起動できます。
Linux 版 FileMaker Server インストーラーは、作業フォルダに指定した workspaces にあらかじめ配置しておきましょう。
{
	"name": "Ubuntu",
	"service": "filemaker",
	"workspaceFolder": "/workspace",
	"dockerComposeFile": [
		"docker-compose.yml"
	],
	"mounts": [
"source=${localWorkspaceFolder}/data,target=/opt/FileMaker/FileMaker Server/Data,type=bind"
	],
	"remoteUser": "vscode"
}
version: '3'
services:
filemaker:
container_name: fms
build:
context: .
dockerfile: Dockerfile
volumes:
- ..:/workspace:cached
ports:
- 443:443
- 2399:2399
- 5003:5003
privileged: trueFROM arm64v8/ubuntu:22.04
# update all software download sources
RUN DEBIAN_FRONTEND=noninteractive apt update
# upgrade all installed software
# packages
RUN DEBIAN_FRONTEND=noninteractive apt full-upgrade -y
# vscode
ARG USERNAME=vscode
ARG USERGROUP=vscode
ARG USER_UID=1000
ARG USER_GID=$USER_UID
RUN apt-get install -y sudo
RUN groupadd -g $USER_GID $USERGROUP
RUN useradd -m -s /bin/bash -u $USER_UID -g $USER_GID -G sudo $USERNAME
RUN echo $USERNAME ALL=\(root\) NOPASSWD:ALL > /etc/sudoers.d/$USERNAME
RUN chmod 0440 /etc/sudoers.d/$USERNAME
# install filemaker server dependencies
RUN DEBIAN_FRONTEND=noninteractive apt install -y acl
RUN DEBIAN_FRONTEND=noninteractive apt install -y apache2-bin
RUN DEBIAN_FRONTEND=noninteractive apt install -y apache2-utils
RUN DEBIAN_FRONTEND=noninteractive apt install -y avahi-daemon
RUN DEBIAN_FRONTEND=noninteractive apt install -y curl
RUN DEBIAN_FRONTEND=noninteractive apt install -y firewalld
RUN DEBIAN_FRONTEND=noninteractive apt install -y fonts-baekmuk
RUN DEBIAN_FRONTEND=noninteractive apt install -y fonts-liberation2
RUN DEBIAN_FRONTEND=noninteractive apt install -y fonts-noto
RUN DEBIAN_FRONTEND=noninteractive apt install -y fonts-takao
RUN DEBIAN_FRONTEND=noninteractive apt install -y fonts-wqy-zenhei
RUN DEBIAN_FRONTEND=noninteractive apt install -y libaio1
RUN DEBIAN_FRONTEND=noninteractive apt install -y libantlr3c-3.4-0
RUN DEBIAN_FRONTEND=noninteractive apt install -y libavahi-client3
RUN DEBIAN_FRONTEND=noninteractive apt install -y libboost-chrono1.74.0
RUN DEBIAN_FRONTEND=noninteractive apt install -y libboost-system1.74.0
RUN DEBIAN_FRONTEND=noninteractive apt install -y libboost-thread1.74.0
RUN DEBIAN_FRONTEND=noninteractive apt install -y libbz2-1.0
RUN DEBIAN_FRONTEND=noninteractive apt install -y libc++1-12
RUN DEBIAN_FRONTEND=noninteractive apt install -y libcurl3-gnutls
RUN DEBIAN_FRONTEND=noninteractive apt install -y libcurl4-gnutls-dev
RUN DEBIAN_FRONTEND=noninteractive apt install -y libcurl4
RUN DEBIAN_FRONTEND=noninteractive apt install -y libdjvulibre21
RUN DEBIAN_FRONTEND=noninteractive apt install -y libetpan20
RUN DEBIAN_FRONTEND=noninteractive apt install -y libevent-2.1-7
RUN DEBIAN_FRONTEND=noninteractive apt install -y libexpat1
RUN DEBIAN_FRONTEND=noninteractive apt install -y libfontconfig1
RUN DEBIAN_FRONTEND=noninteractive apt install -y libfreetype6
RUN DEBIAN_FRONTEND=noninteractive apt install -y libgomp1
RUN DEBIAN_FRONTEND=noninteractive apt install -y libheif1
# RUN DEBIAN_FRONTEND=noninteractive apt install -y libicu66
RUN DEBIAN_FRONTEND=noninteractive apt install -y libicu70
# RUN DEBIAN_FRONTEND=noninteractive apt install -y libilmbase24
RUN DEBIAN_FRONTEND=noninteractive apt install -y libilmbase25
RUN DEBIAN_FRONTEND=noninteractive apt install -y libjpeg-turbo8
RUN DEBIAN_FRONTEND=noninteractive apt install -y liblqr-1-0
RUN DEBIAN_FRONTEND=noninteractive apt install -y liblzma5
RUN DEBIAN_FRONTEND=noninteractive apt install -y libodbc1
RUN DEBIAN_FRONTEND=noninteractive apt install -y libomniorb4-2
RUN DEBIAN_FRONTEND=noninteractive apt install -y libomp5-12
# RUN DEBIAN_FRONTEND=noninteractive apt install -y libopenexr24
RUN DEBIAN_FRONTEND=noninteractive apt install -y libopenexr25
RUN DEBIAN_FRONTEND=noninteractive apt install -y libpam0g
RUN DEBIAN_FRONTEND=noninteractive apt install -y libpng16-16
RUN DEBIAN_FRONTEND=noninteractive apt install -y libsasl2-2
RUN DEBIAN_FRONTEND=noninteractive apt install -y libtiff5
RUN DEBIAN_FRONTEND=noninteractive apt install -y libuuid1
# RUN DEBIAN_FRONTEND=noninteractive apt install -y libvpx6
RUN DEBIAN_FRONTEND=noninteractive apt install -y libvpx7
RUN DEBIAN_FRONTEND=noninteractive apt install -y libwebpdemux2
RUN DEBIAN_FRONTEND=noninteractive apt install -y libwebpmux3
RUN DEBIAN_FRONTEND=noninteractive apt install -y libxml2
RUN DEBIAN_FRONTEND=noninteractive apt install -y libxpm4
RUN DEBIAN_FRONTEND=noninteractive apt install -y libxslt1.1
RUN DEBIAN_FRONTEND=noninteractive apt install -y lsb-release
RUN DEBIAN_FRONTEND=noninteractive apt install -y logrotate
RUN DEBIAN_FRONTEND=noninteractive apt install -y nginx
RUN DEBIAN_FRONTEND=noninteractive apt install -y odbcinst1debian2
RUN DEBIAN_FRONTEND=noninteractive apt install -y openjdk-11-jre
RUN DEBIAN_FRONTEND=noninteractive apt install -y openssl
RUN DEBIAN_FRONTEND=noninteractive apt install -y policycoreutils
RUN DEBIAN_FRONTEND=noninteractive apt install -y sysstat
RUN DEBIAN_FRONTEND=noninteractive apt install -y unzip
RUN DEBIAN_FRONTEND=noninteractive apt install -y zip
RUN DEBIAN_FRONTEND=noninteractive apt install -y zlib1g
RUN DEBIAN_FRONTEND=noninteractive apt install -y lsof
RUN DEBIAN_FRONTEND=noninteractive apt install -y nano
# install user management
RUN DEBIAN_FRONTEND=noninteractive apt install -y init
# time zoon for ja_JP
RUN DEBIAN_FRONTEND=noninteractive apt-get install -y tzdata locales && locale-gen ja_JP.UTF-8
ENV TZ Asia/Tokyo
ENV LANG ja_JP.UTF-8
ENV LANGUAGE ja_JP:ja
# clean up installations
RUN DEBIAN_FRONTEND=noninteractive apt --fix-broken install -y
RUN DEBIAN_FRONTEND=noninteractive apt autoremove -y
RUN DEBIAN_FRONTEND=noninteractive apt clean -y
# document the ports that should be
# published when filemaker server
# is installed
# EXPOSE 80
EXPOSE 443
EXPOSE 2399
EXPOSE 5003
# when containers run, start this
# command as root to initialize
# user management
USER root
CMD ["/sbin/init"]
WORKDIR /workspaceVSCode からコンテナの起動
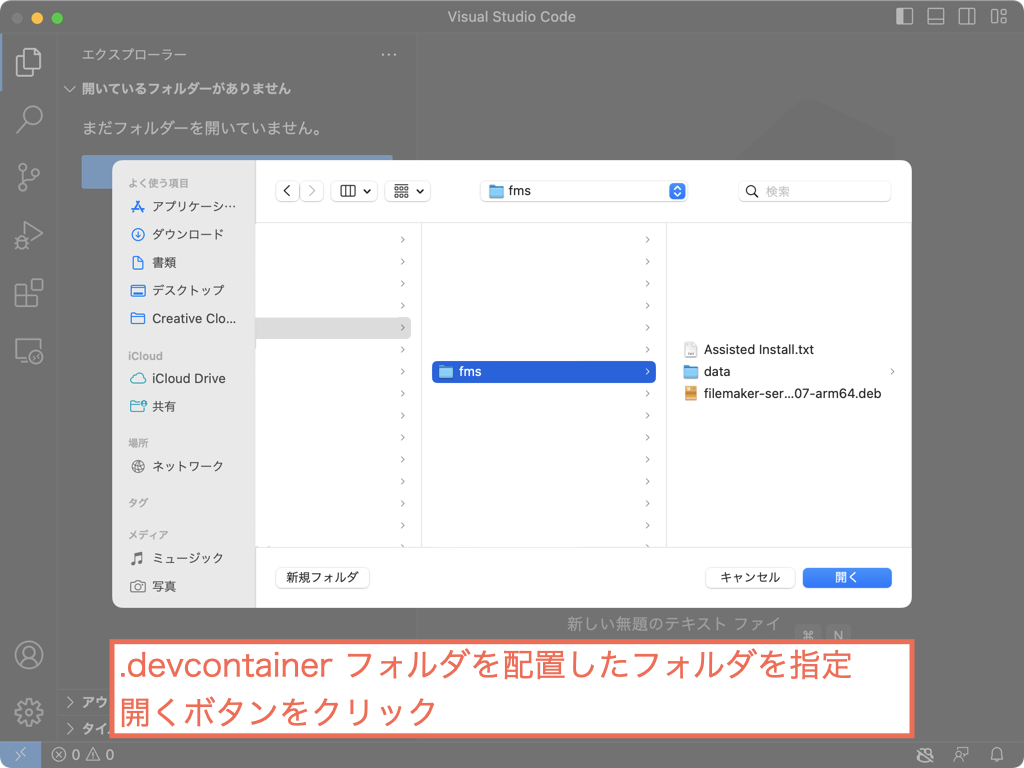
ファイルの配置が終わったら、VSCode からコンテナを起動します。
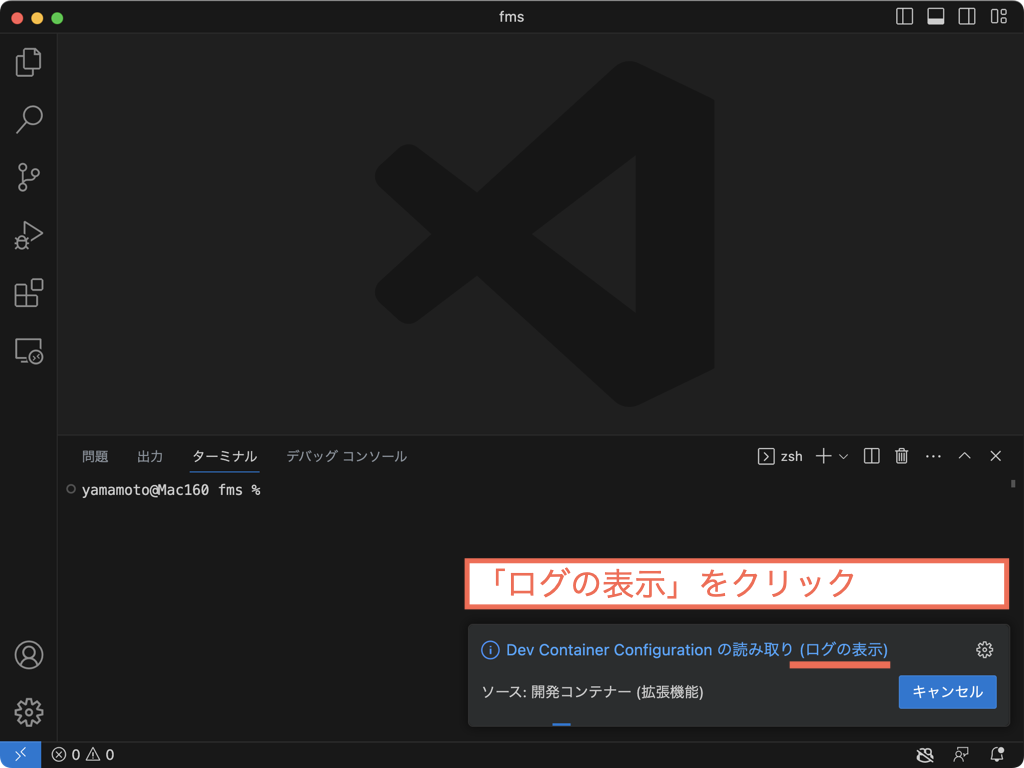
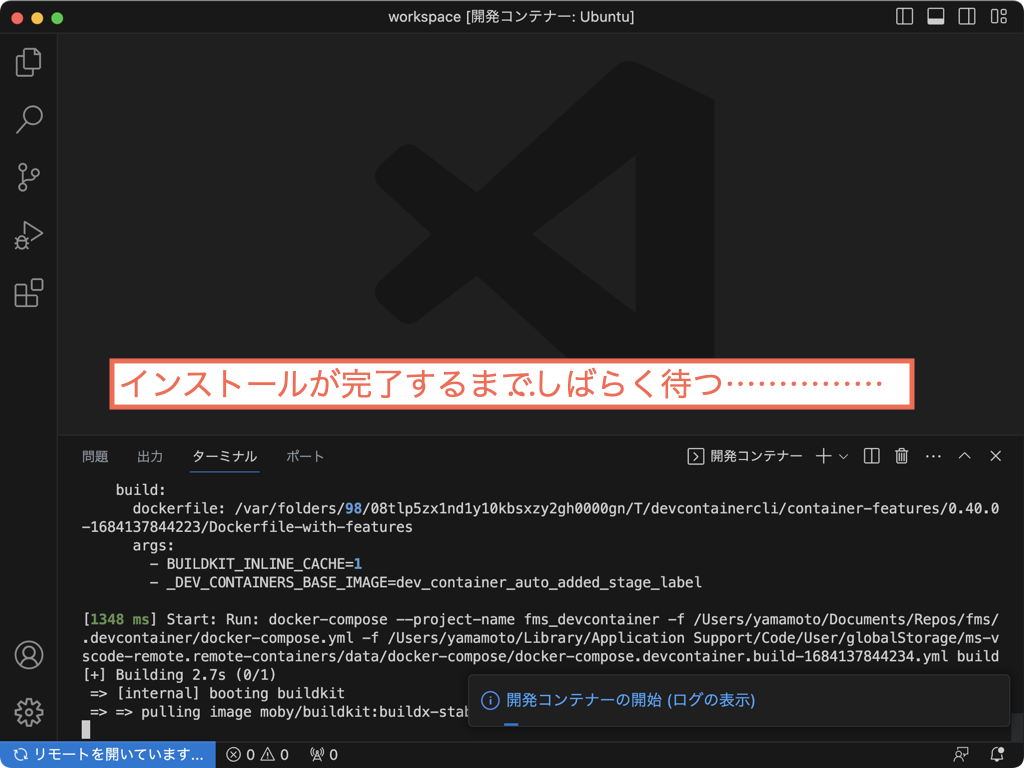
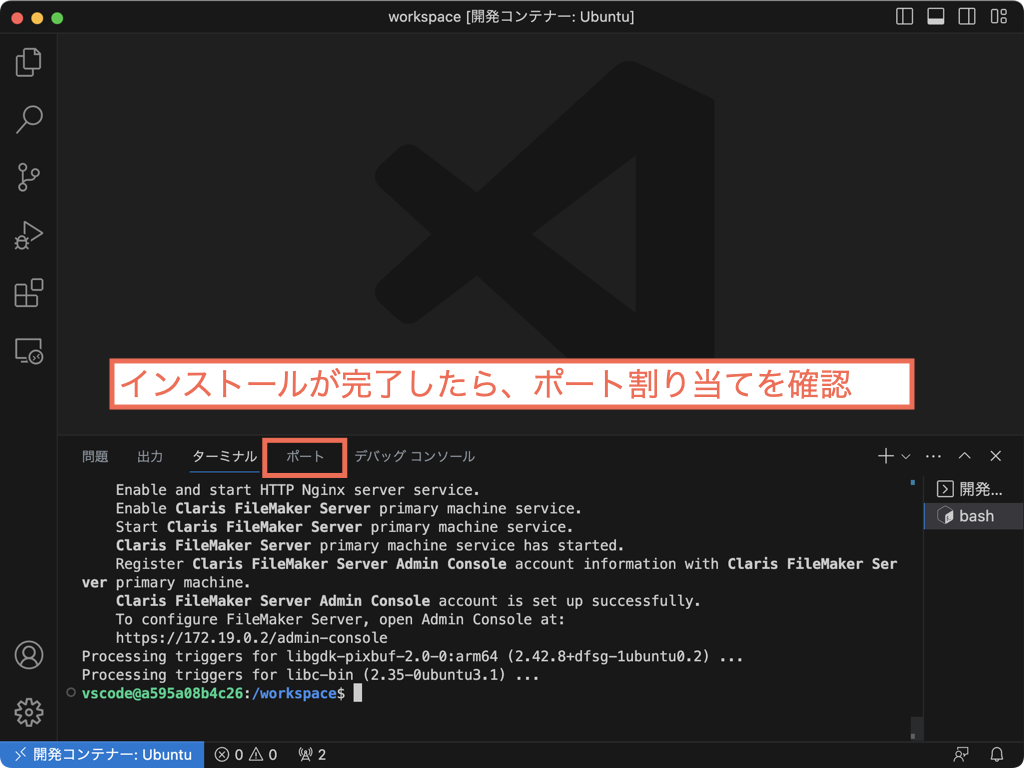
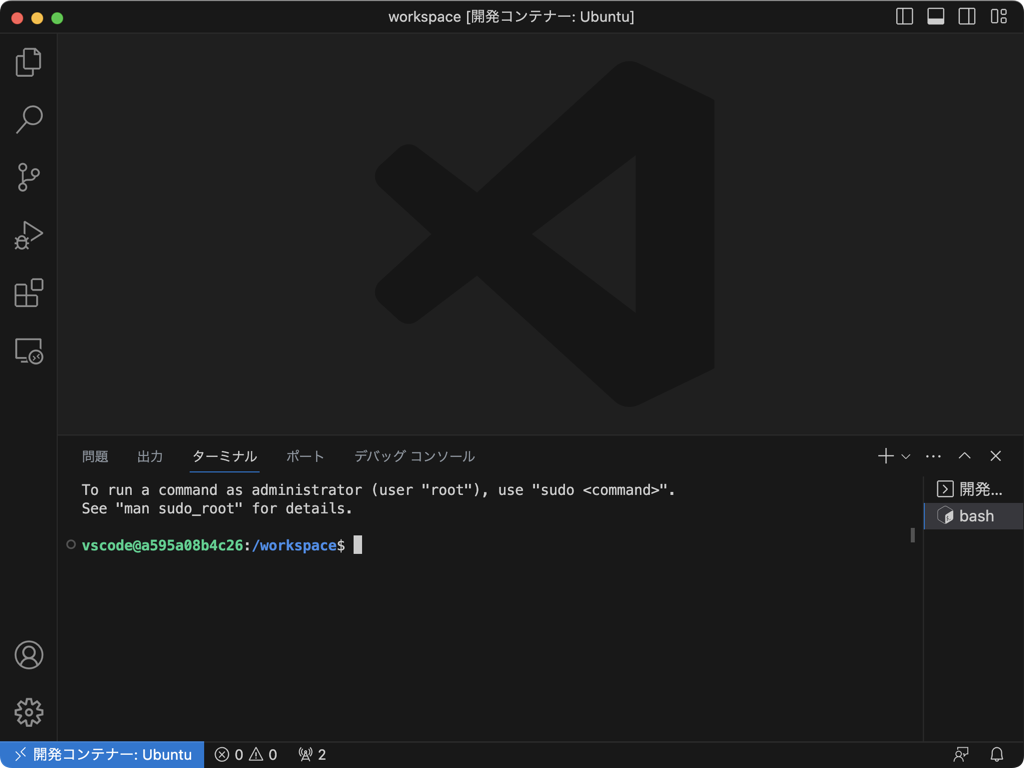
ログの更新がとまり、VSCode の拡張機能のインストールがインストールされたらコンテナの準備がととのいました。ターミナルからアクセスして FileMaker Server をインストールします。
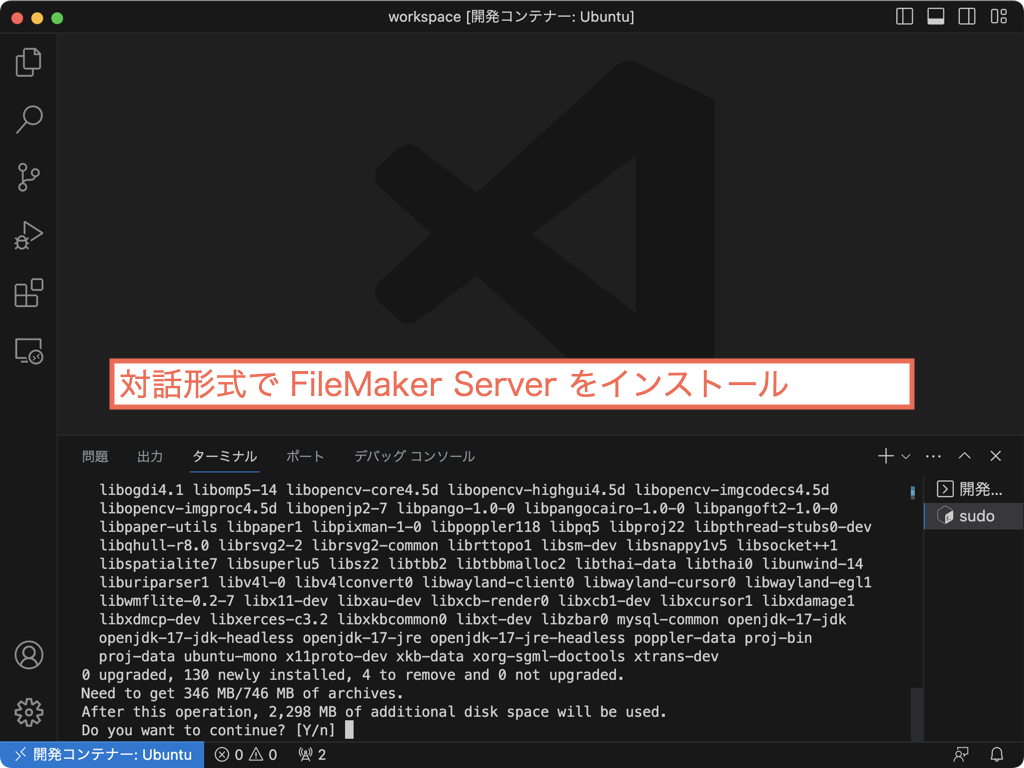
FileMaker Server のインストール
コンテナに接続するには、ファイルメニュー>ターミナル>新しいターミナルをクリックします。

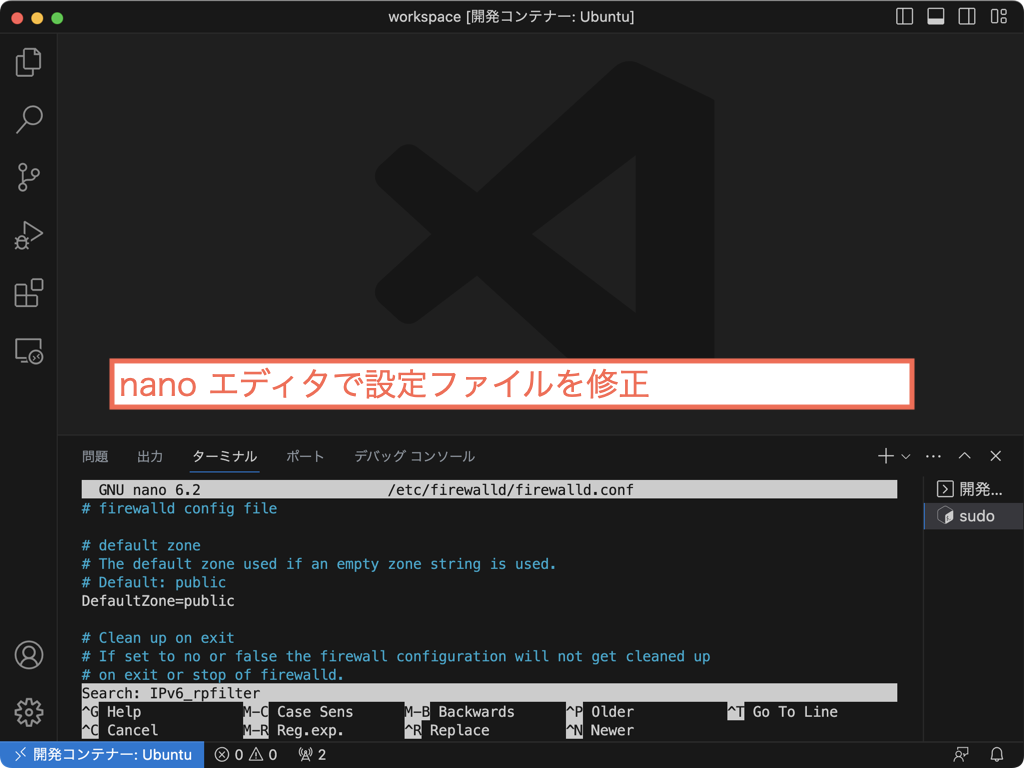
インストールの前に
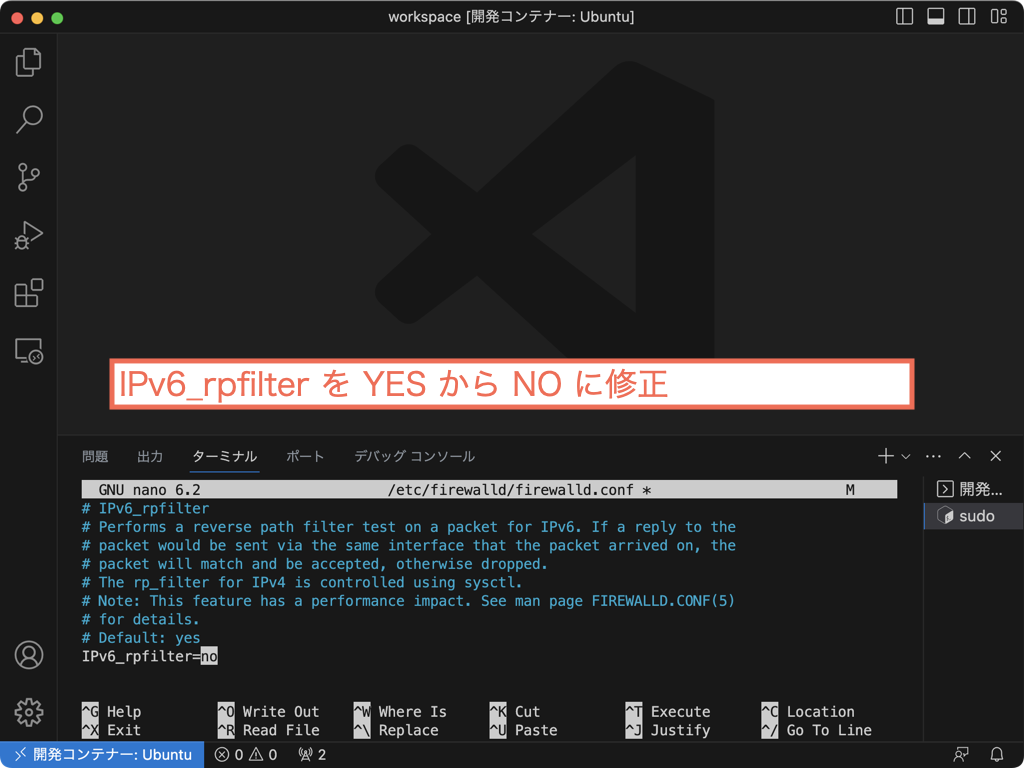
nginx がうまく起動しない場合、以下の設定ファイルの次の値を YES から NO に変更すると無事起動しました。
IPv6_rpfilter=no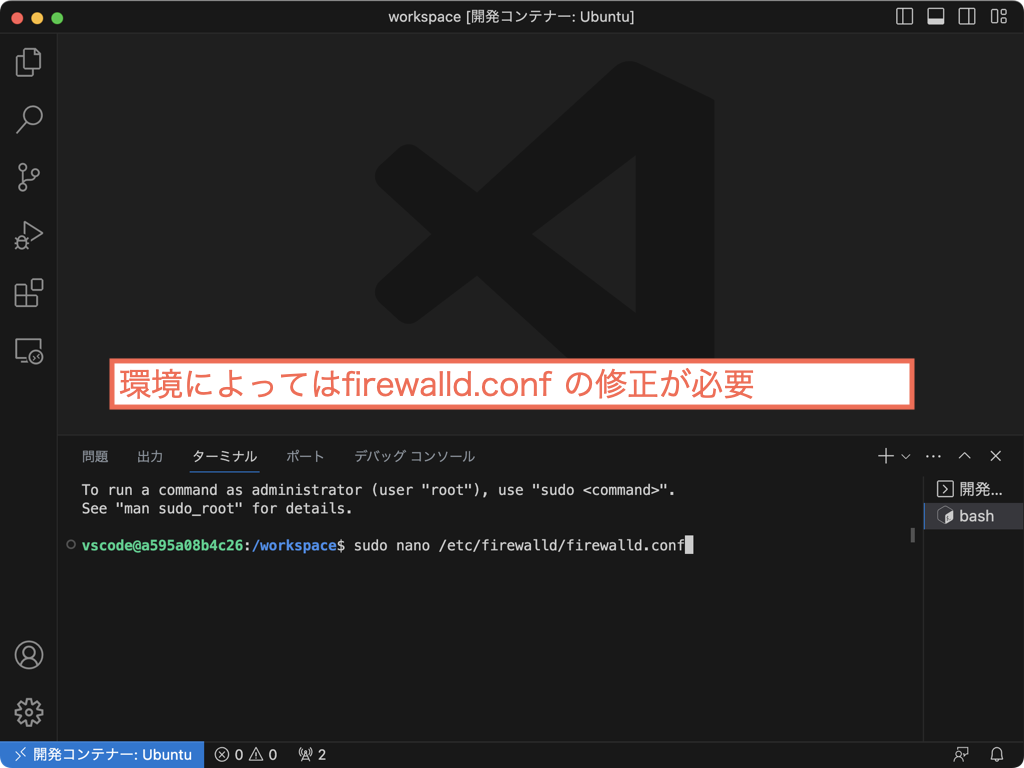
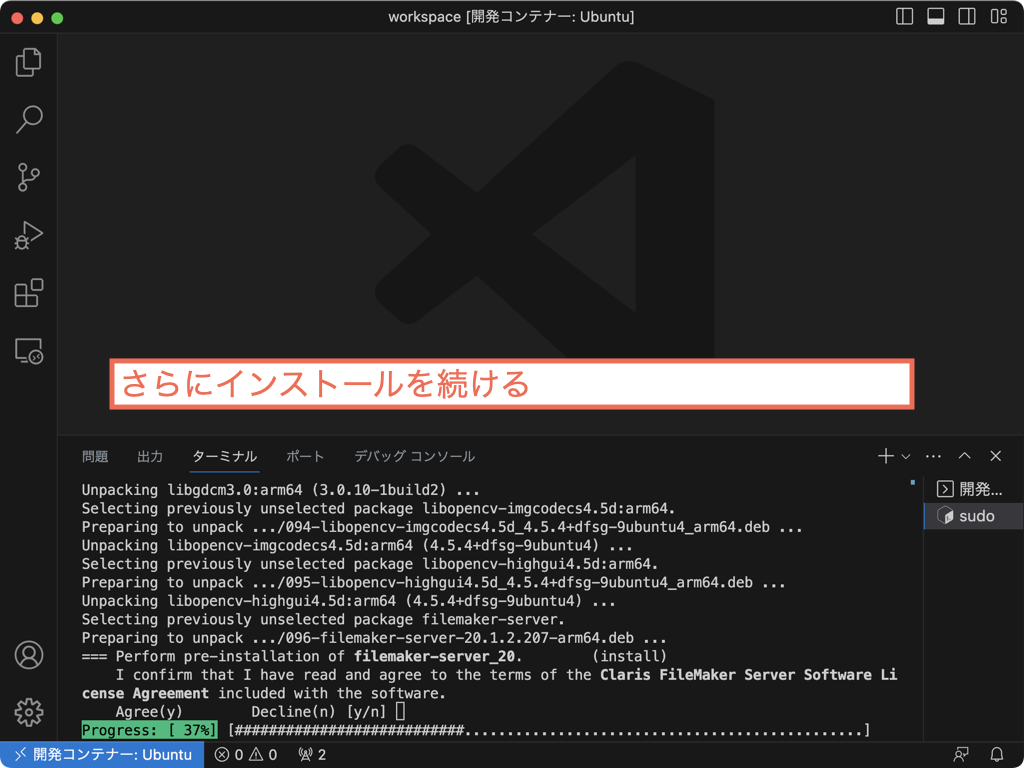
FileMaker Server のインストール(続き)
コマンドを実行して FileMaker Server をインストールします。
sudo apt install ./FileMaker Server のインストーラー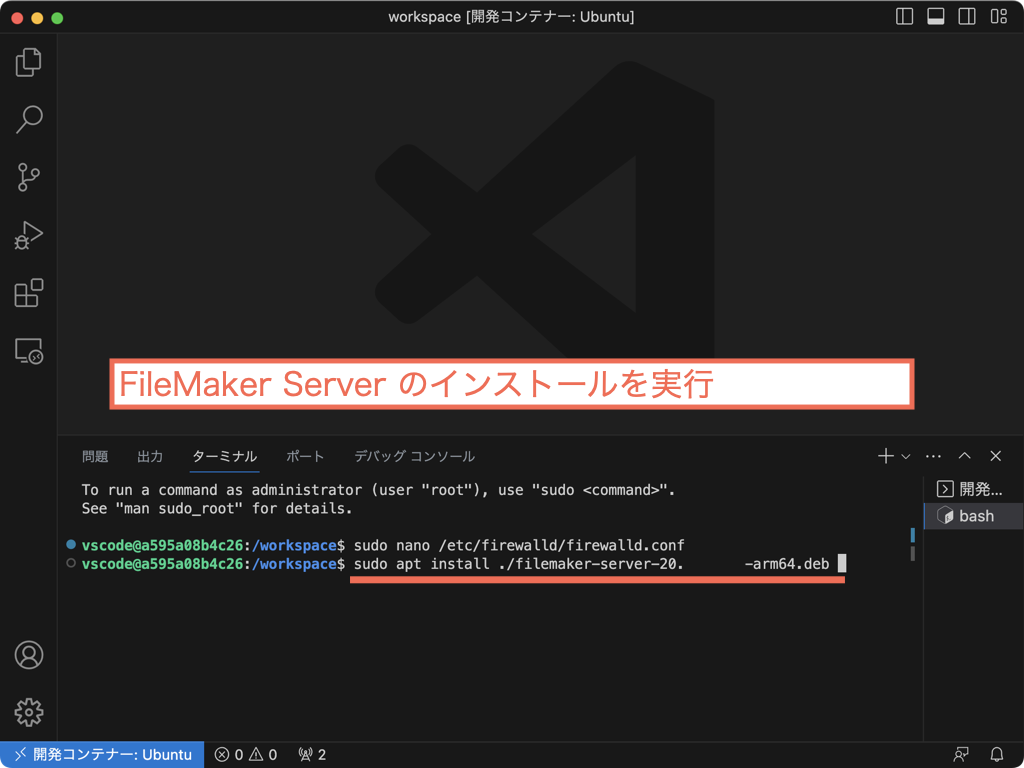
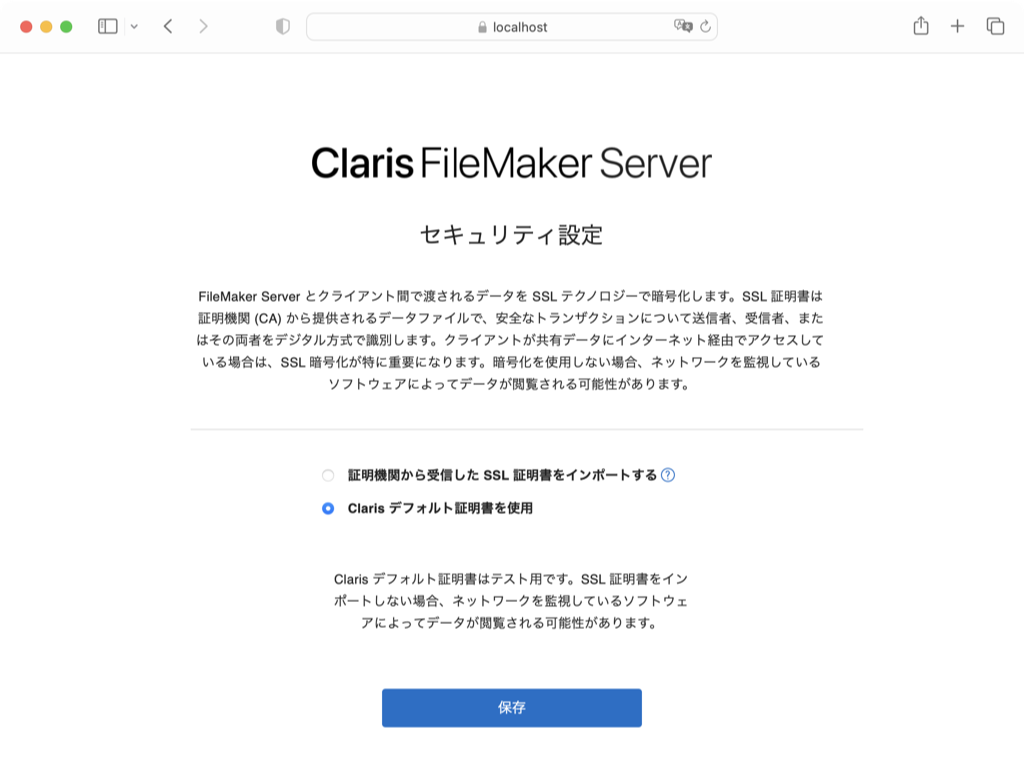
Admin Console の設定
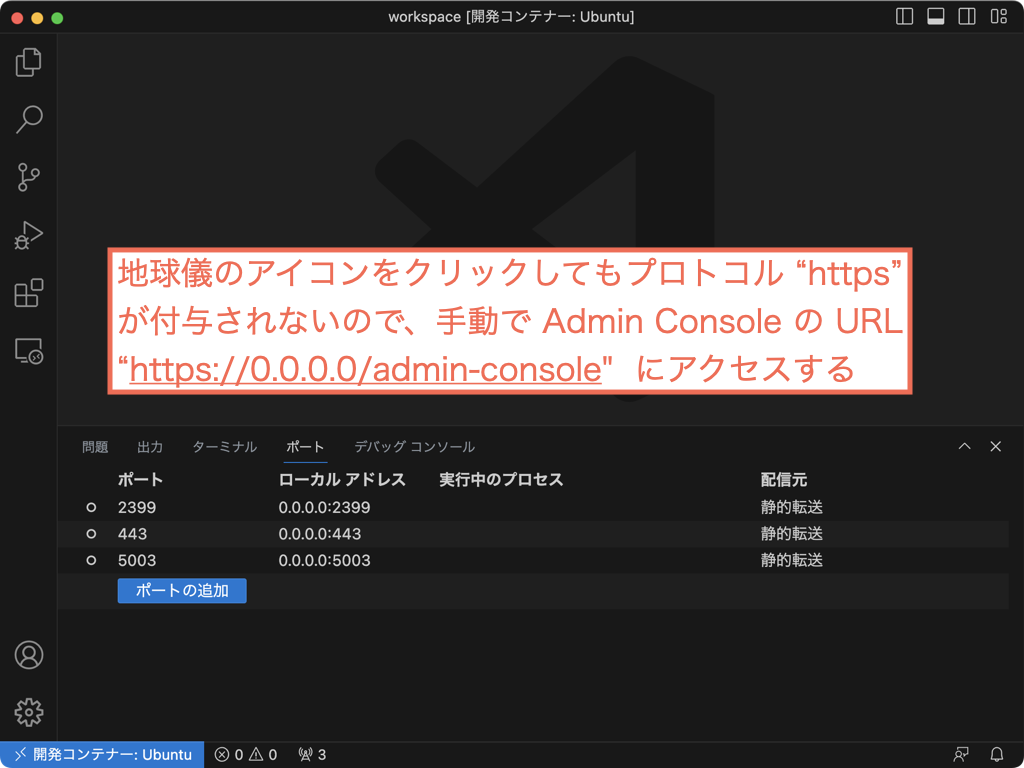
VSCode Dev Container を利用している場合、公開されたポートへのアクセスは簡単です。ポートを確認して地球儀アイコンをクリックするだけで、ホスト PC の任意のポートに転送してくれます。
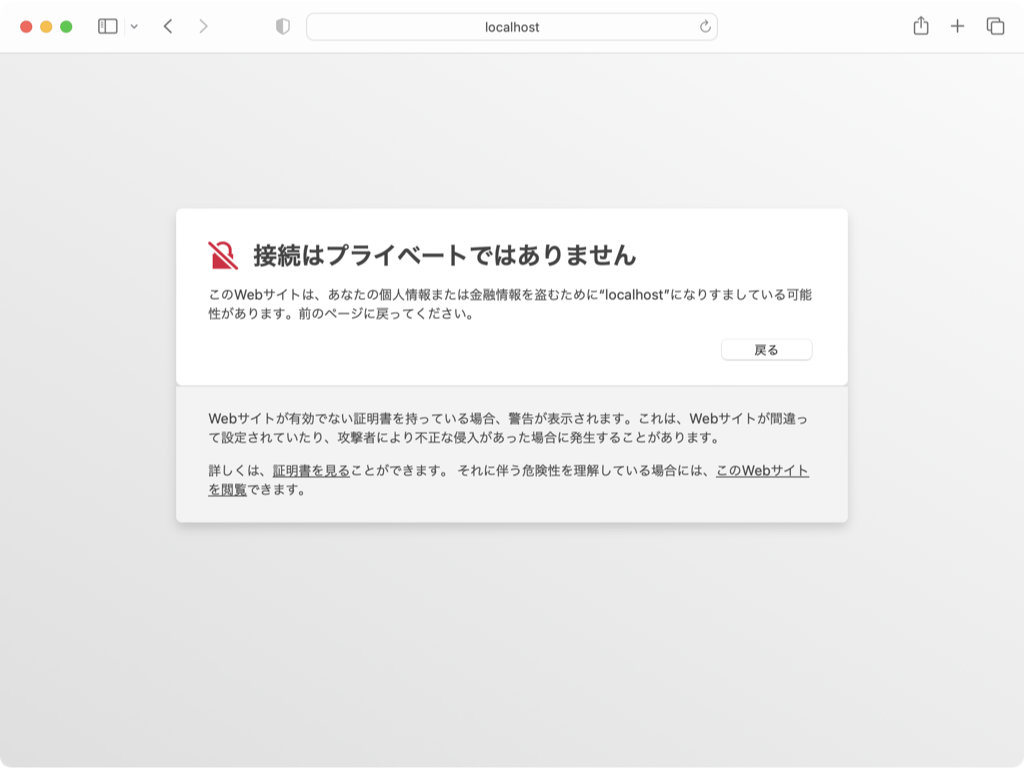
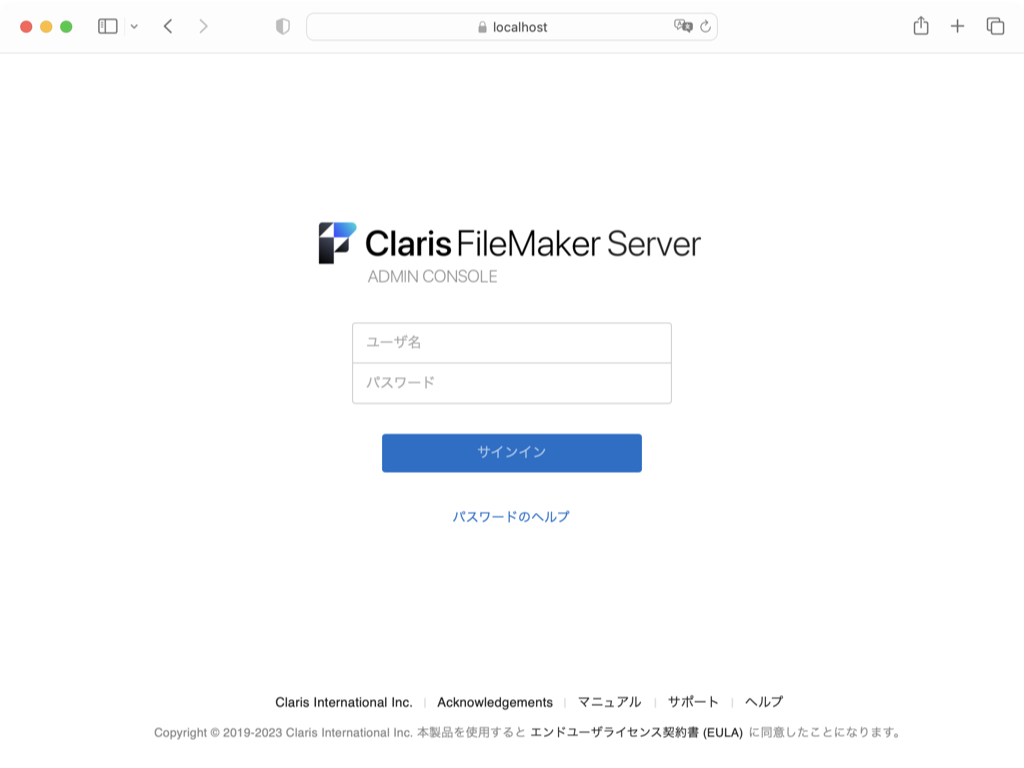
※ FileMaker Admin Console の管理画面は https:// から始まるプロトコルを使うので手動で追加する。
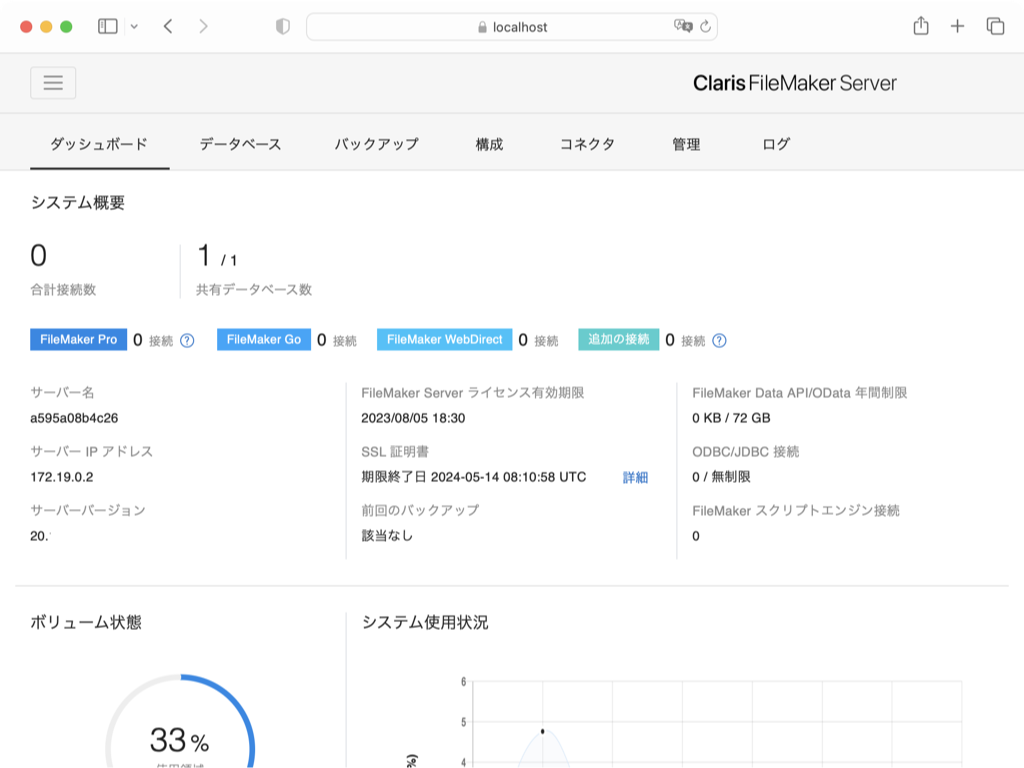
後は、通常の FileMaker Server 同様に Admin Console の URL にアクセスして管理画面を開くことができます。お疲れ様でした!